

Why Analyze DNS?
Domain Name System (DNS) converts hostnames to IP addresses and plays a crucial role in the infrastructure of the Internet. In this experiment, we will closely examine the details of DNS anomalies on the client side.
From the perspective of a DNS client, the role is relatively straightforward — the client sends a request to its local DNS server and receives a response. Much of the communication between DNS hierarchical servers happens recursively or iteratively to resolve the client’s DNS queries, with most operations being invisible to the client. However, from the DNS client’s viewpoint, the protocol is quite simple — it directs queries to the local DNS server and receives responses from that server.
How to Detect DNS Anomalies
Since we primarily use the DNS protocol, we will utilize the nslookup command.
Step 1. nslookup
The nslookup tool allows a host to query DNS records of any specified DNS server. To accomplish this task, nslookup sends a DNS query to the specified DNS server, receives a DNS reply, and displays the results.
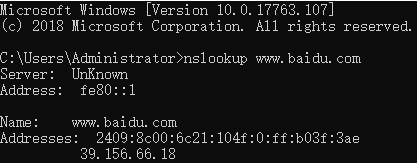
The command’s response provides two pieces of information:
- The name and IP address of the DNS server responding.
- The response itself, which includes the hostname and IP address of
www.baidu.com.
Second command:
nslookup -type=NS baidu.com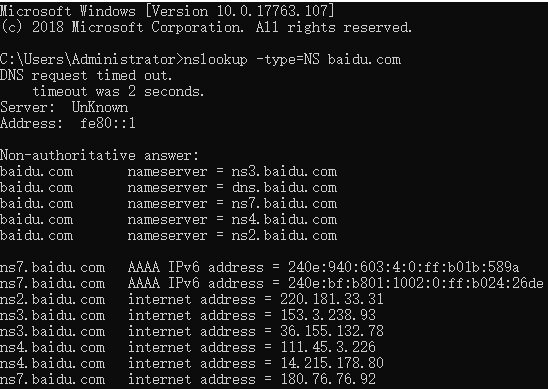
This command with the option -type=NS and the domain name baidu.com first displays the DNS servers responding (defaulting to the local DNS server) and three DNS servers for baidu.com. However, nslookup also indicates that this response is non-authoritative, meaning it comes from a server’s cache.
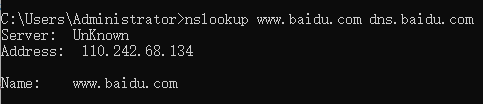
Third command:
nslookup www.baidu.com dns.baidu.comThis command directs the query to the DNS server dns.baidu.com instead of the default DNS server (public1.114dns.com/114.114.114.114). Thus, the query and response transaction occurs directly between our host and dns.baidu.com. In this example, the IP address of the host www.baidu.com is directly provided by the DNS server dns.baidu.com.
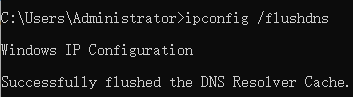
We also learned that DNS records are cached. To clear the cache, the command ipconfig /flushdns is used.
Step 2. Track DNS Anomalies via Unicorn
Prepare as follows:
- Clear DNS cache in the host using
ipconfig /flushdns. - Open the browser and clear the browser cache.
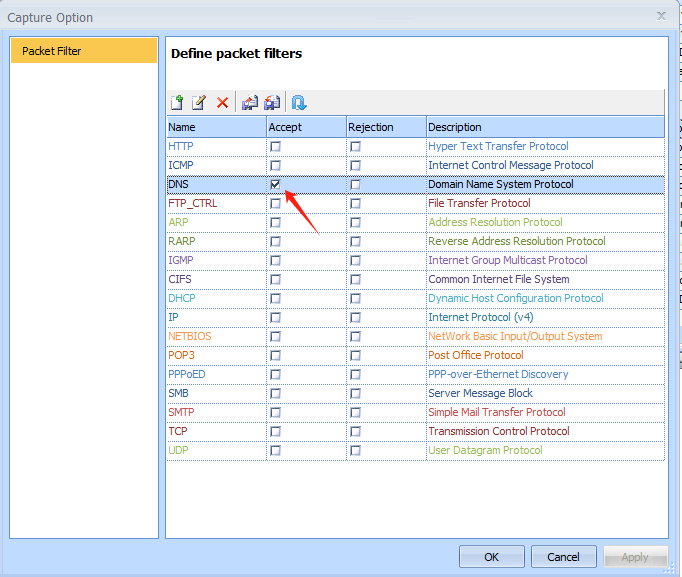
- Open Unicorn and Enable DNS filtering so that Unicorn will only capture DNS packets.
Step 3. Use HTTP
Visit www.vaidu.com to view a DNS packet:
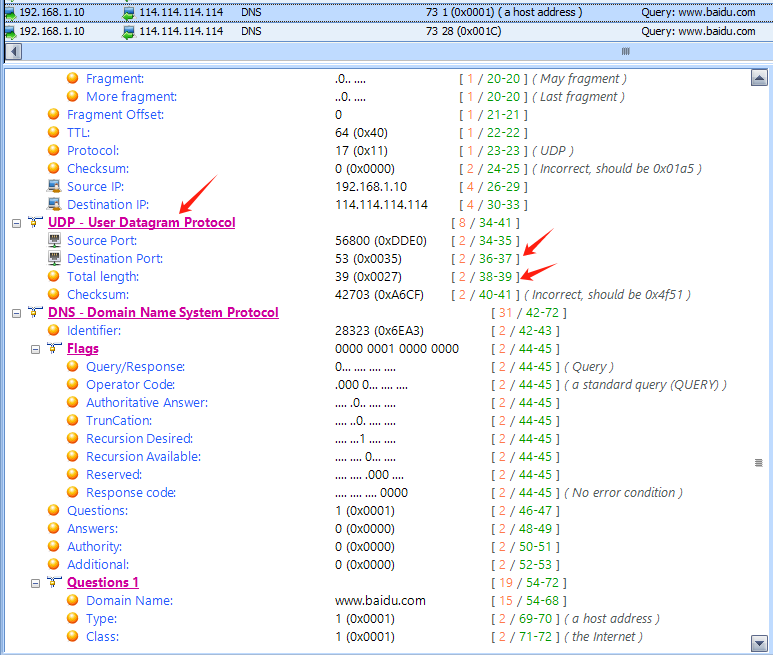
It’s observed that DNS query packets are sent over UDP. The source port number of the query packet is a random port, while the destination port number is 53. The response packet is the reverse.
The destination IP address of the query packet is 114.114.114.114. The specific contents of the DNS query packet are as follows:

The Type field is A (value is 1), indicating it queries a host’s IP address. The Class field is IN (value is 1), indicating Internet addresses. The DNS response packet’s specific contents are as follows:
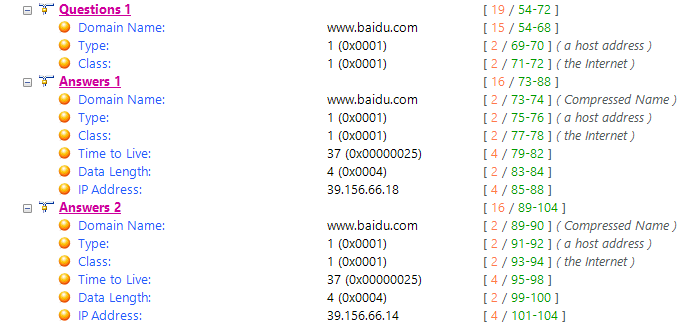
Three Answers are included, with the second one analyzed:
www.baidu.com: type A, class IN, addr39.156.66.14Name:www.baidu.com(domain name queried)Type:A(Host Address)Class:INTime to live: 37(37 second)Data length: 4Address:39.156.66.14(IP address provided in response)
The value of the Name is www.a.shifen.com, indicating that the DNS request’s domain name is www.a.shifen.com. The type is A, signifying that it is requesting the IP address corresponding to that domain name. The value of the Address shows the IP address corresponding to that domain name.
Step 4. Use nslookup
Clear the host’s DNS cache using ipconfig /flushdns.
Start Unicorn capture, then use the command nslookup www.baidu.com in the command line. The results are similar to those above, but with the destination IP address now the default local DNS server’s IP address (114.114.114.114). When querying using nslookup www.baidu.com dns.baidu.com, the results show the destination IP address as 110.242.68.134, indicating it did not query the default local DNS server.